
How To
Task-focused walkthroughs, each with real screenshots from a live deployment. For the full feature reference, see Roles & Permissions, Support Ticketing, and System Audit.
Add a client and email them their VPN profile
Section titled “Add a client and email them their VPN profile”A VPN client and its linked portal account are created together, from one form – there’s no separate “add a client” step.
-
Go to Users and click Add User.
-
Fill in the account fields (username, name, email) and choose a Group – this sets the new account’s role/permissions. Under Device & Access Policy, leave Create new VPN profile selected and enter the device’s MAC address. Optionally restrict the allowed device OS or set a monthly bandwidth quota here instead of leaving it unlimited.
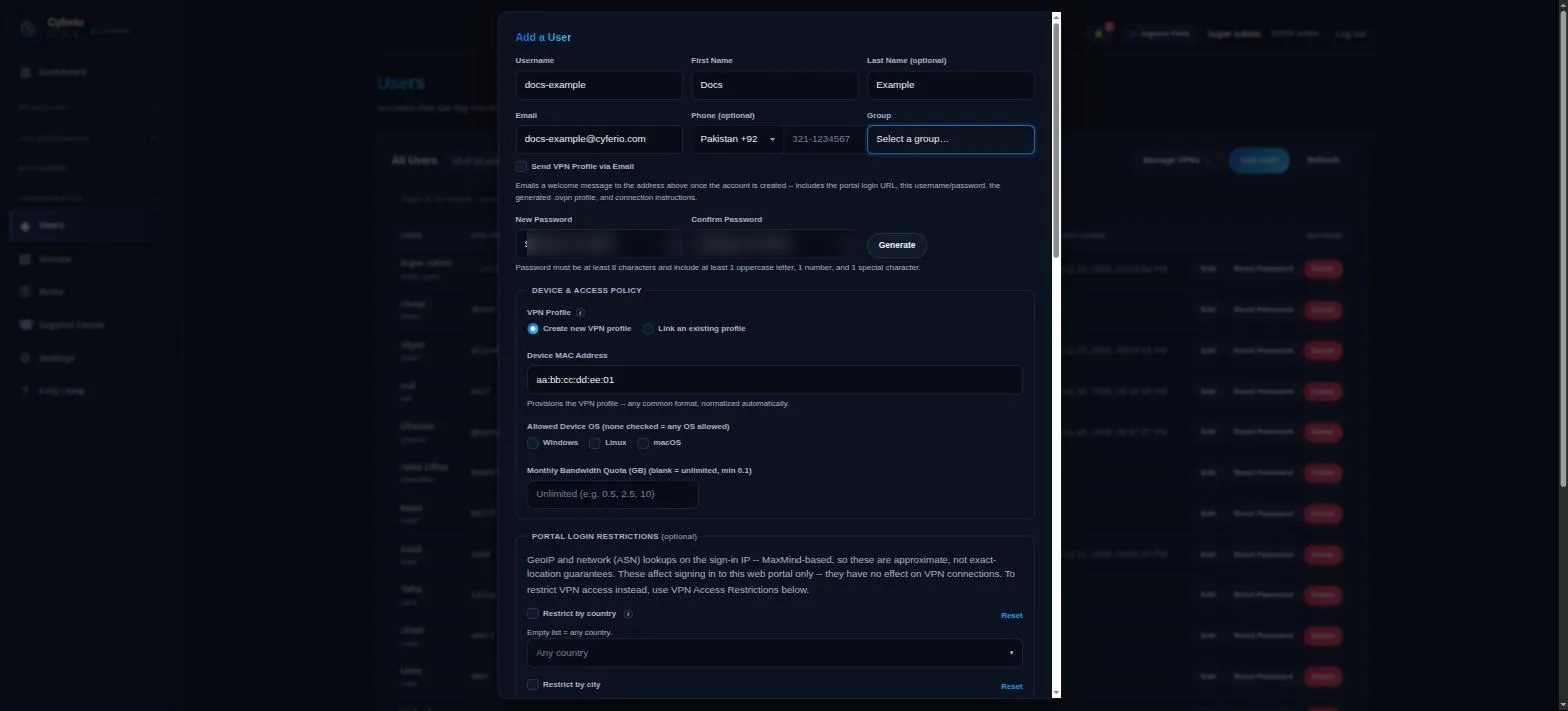
Leave Send VPN Profile via Email unchecked here if you’d rather send the
.ovpnprofile separately later (see the next step) – checking it emails the profile immediately once the account is created. -
Click Add User. The account and its VPN certificate are created together; the new client immediately shows up on both the Users and VPN Clients pages.
-
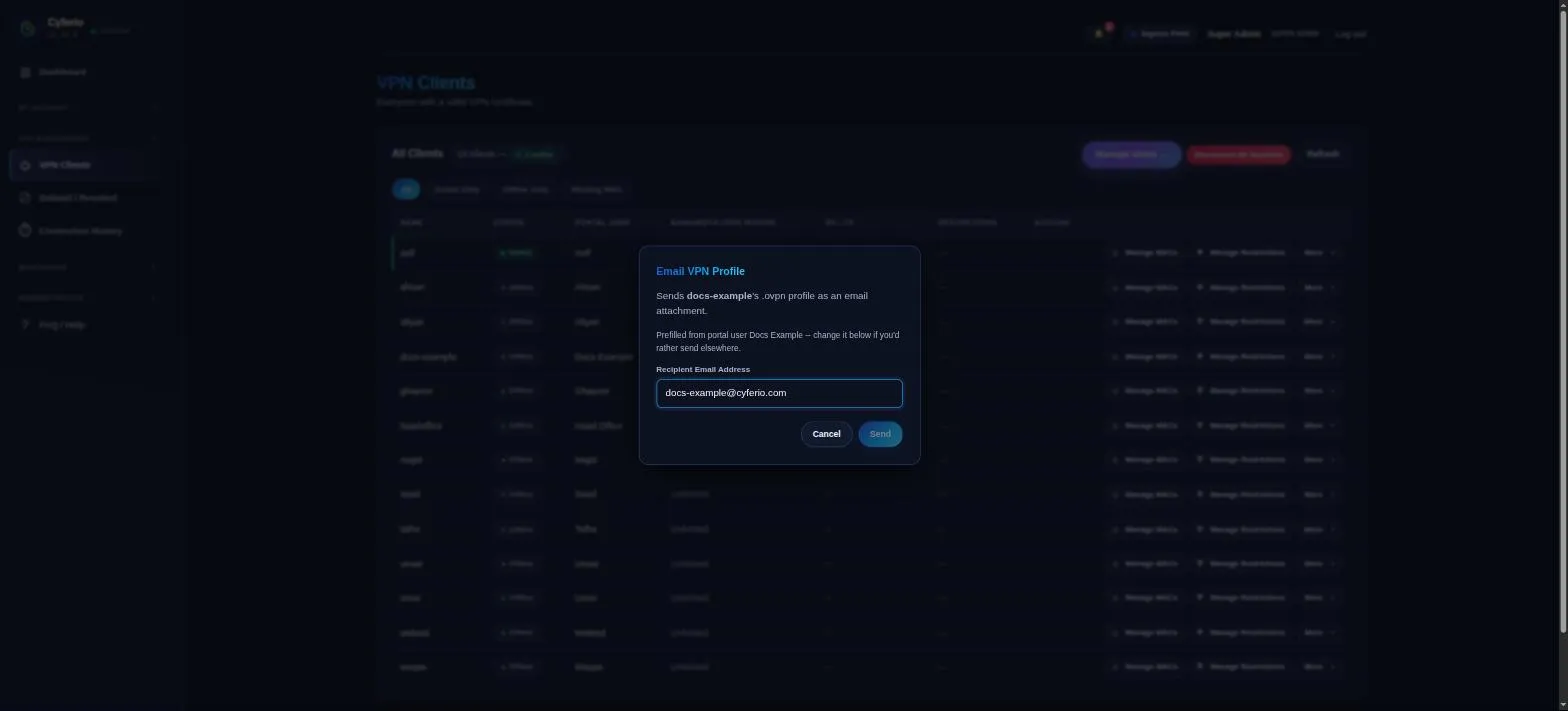
To email the profile later (or to a different address than the account’s own), go to VPN Clients, open the client’s More menu, and choose Email Profile. The recipient address is pre-filled from the linked portal user but editable.
Manage a support ticket
Section titled “Manage a support ticket”Any account (including yours) can raise a ticket from My Support; every admin with Support Center access can see and act on all of them from Support Center.
-
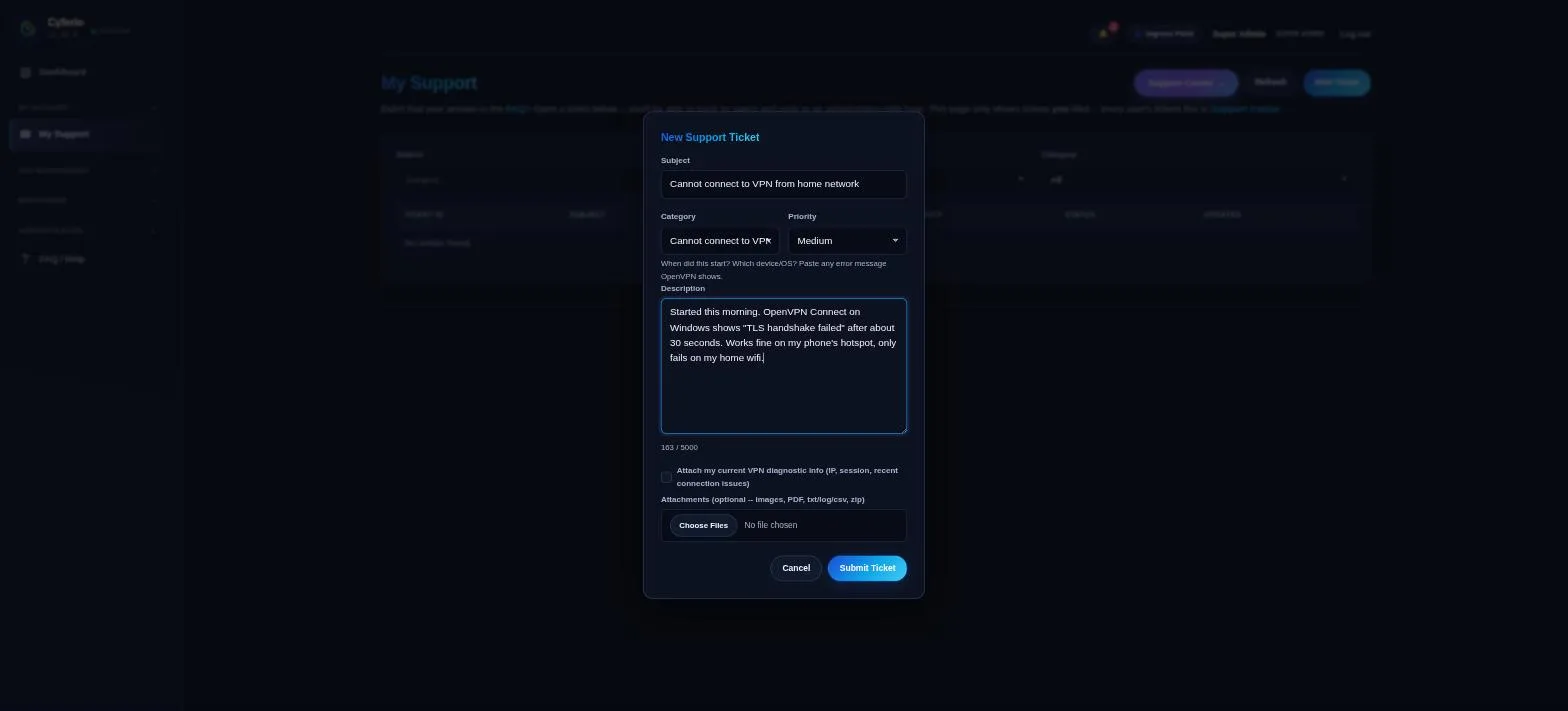
Raising a ticket (self-service, any user): go to My Support → New Ticket, pick a category and priority, and describe the issue.
-
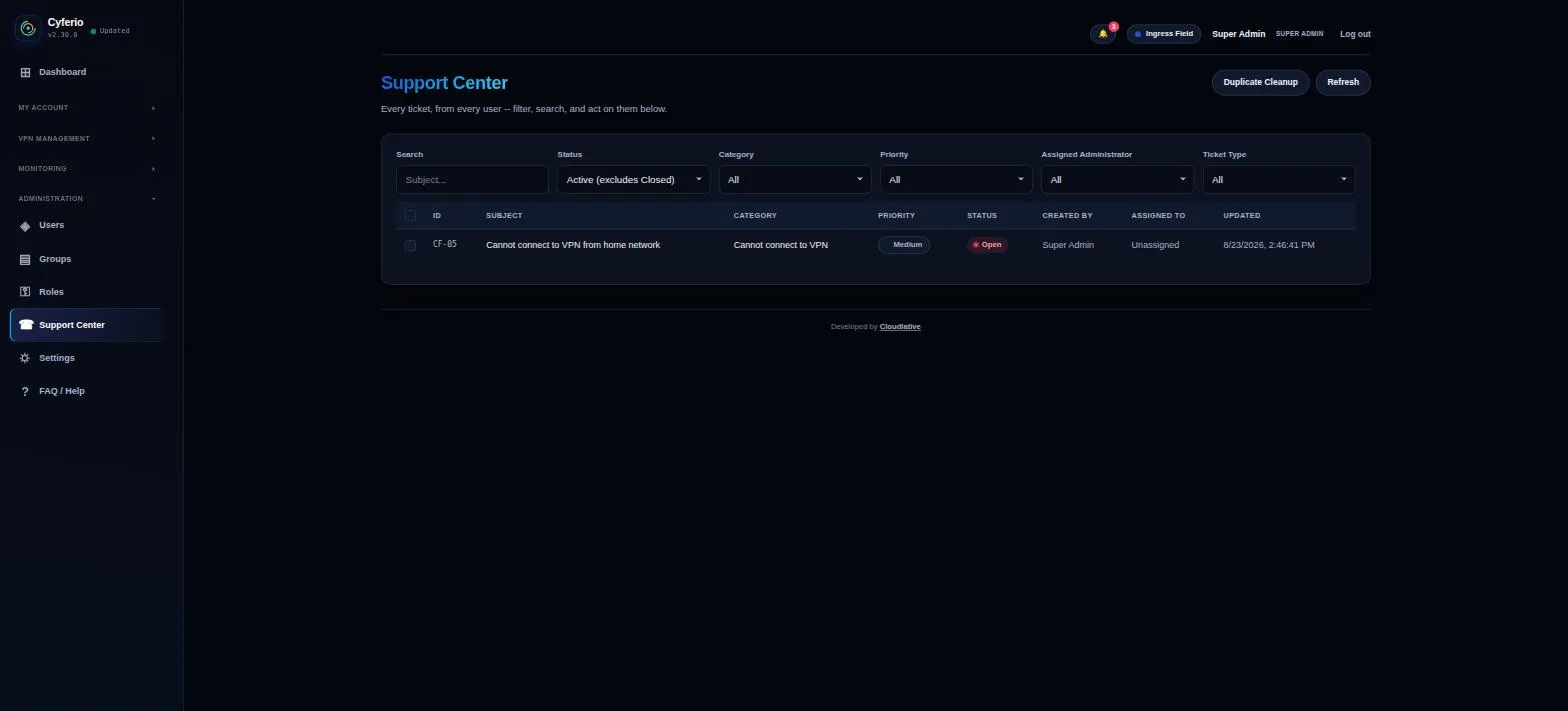
Working the queue (admin): go to Support Center to see every ticket from every user, filterable by status, category, priority, and assignee.
-
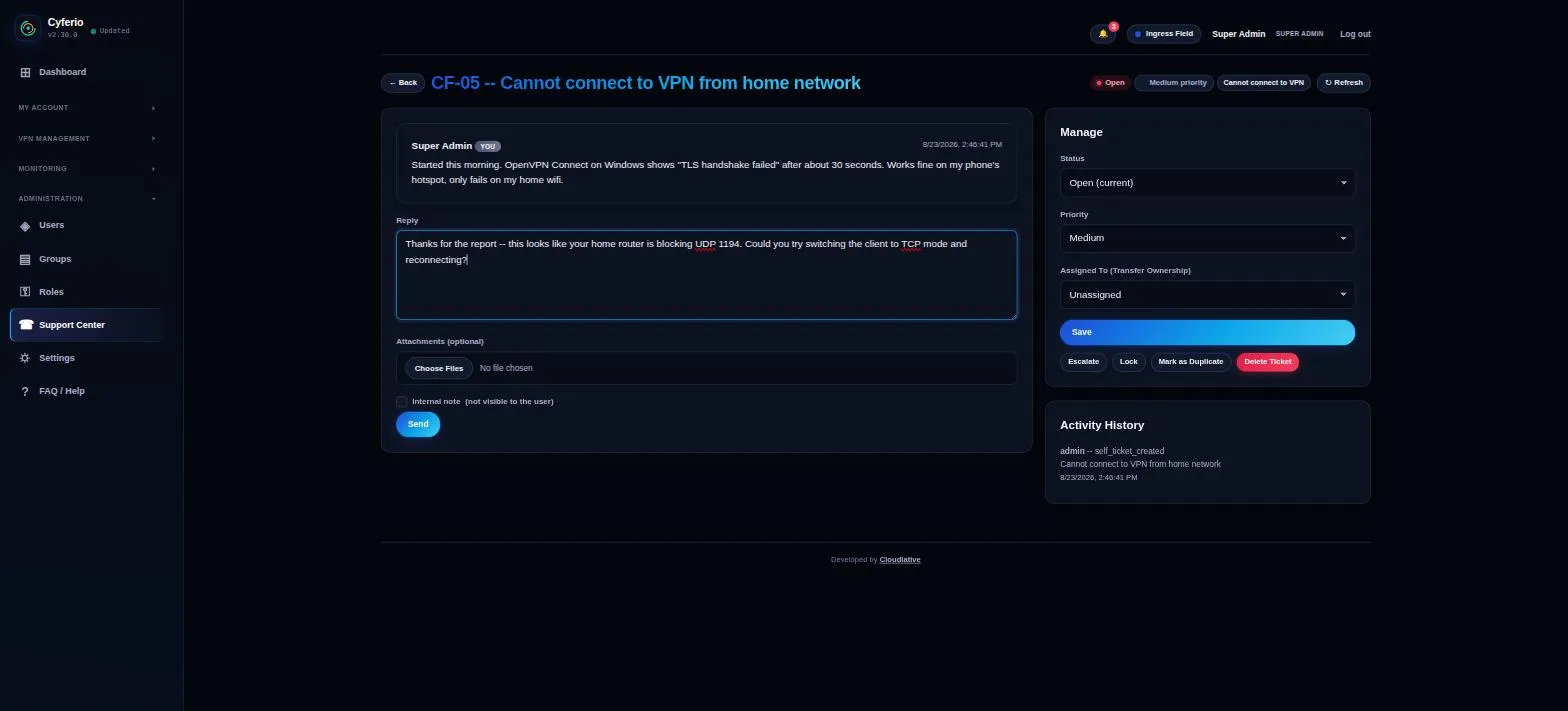
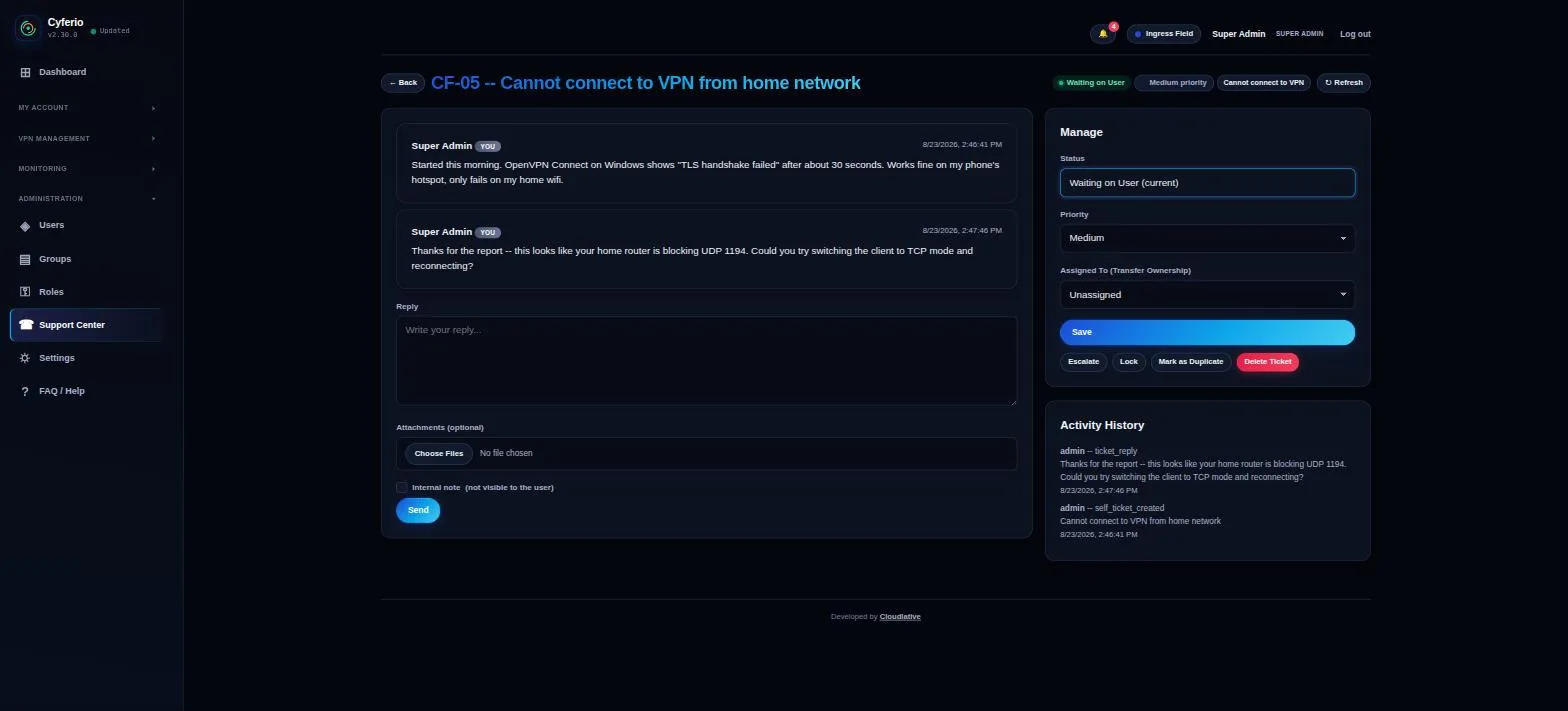
Open a ticket and use the Reply box to respond. Replying to an Open ticket automatically moves it to Waiting on User – there’s no separate “mark as waiting” step.
-
Once it’s resolved, use the Status dropdown in the Manage panel to set it to Resolved, then Closed. The full status history – every transition, by whom, and when – is always visible in Activity History.
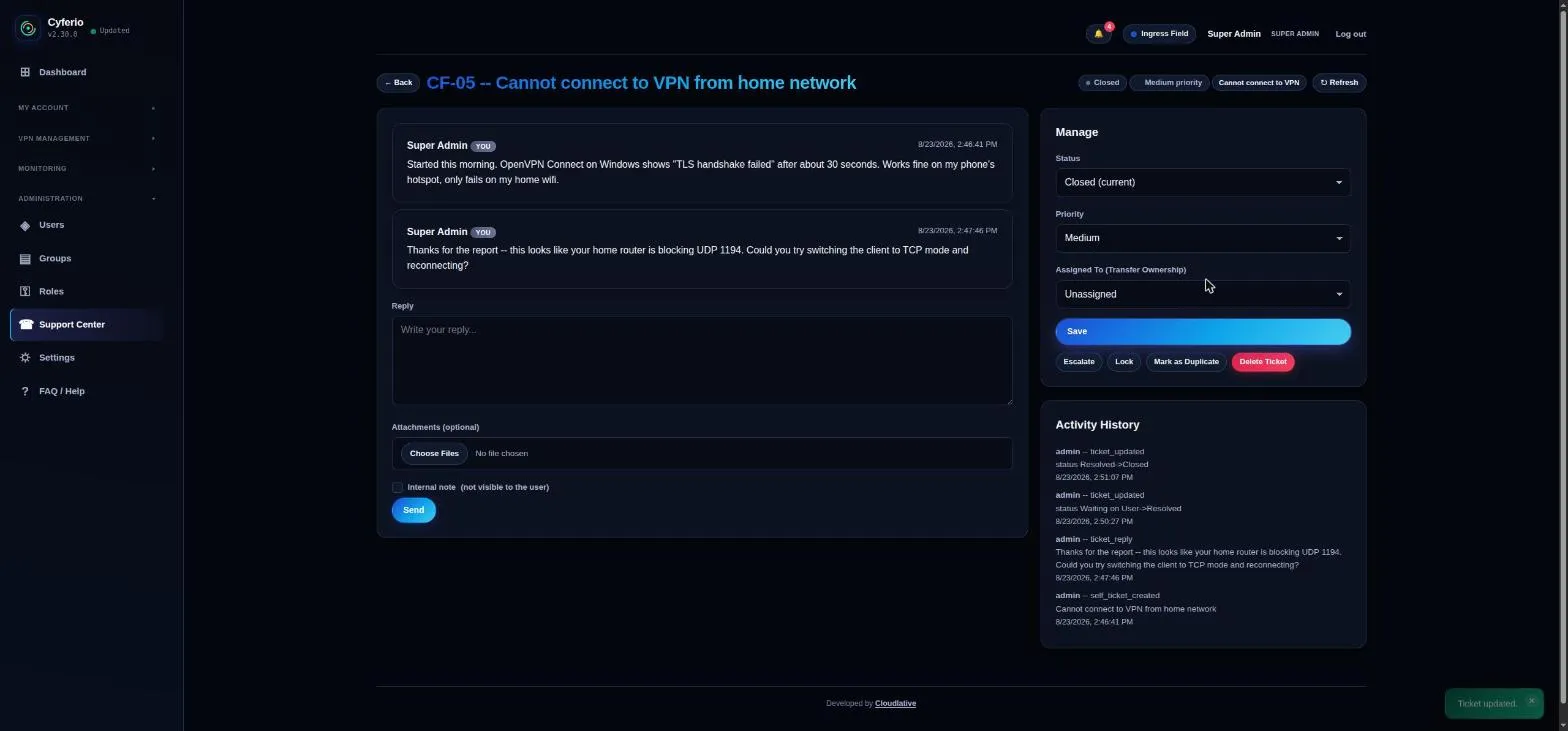
See Support Ticketing for the complete status lifecycle, including which transitions are allowed and why Closed tickets stay out of the default queue view.
Run a System Audit and fix a finding
Section titled “Run a System Audit and fix a finding”-
Go to System Audit and click Run Audit Now. The Security Score and every individual finding (system, SSH, and firewall checks) appear once the scan completes.
-
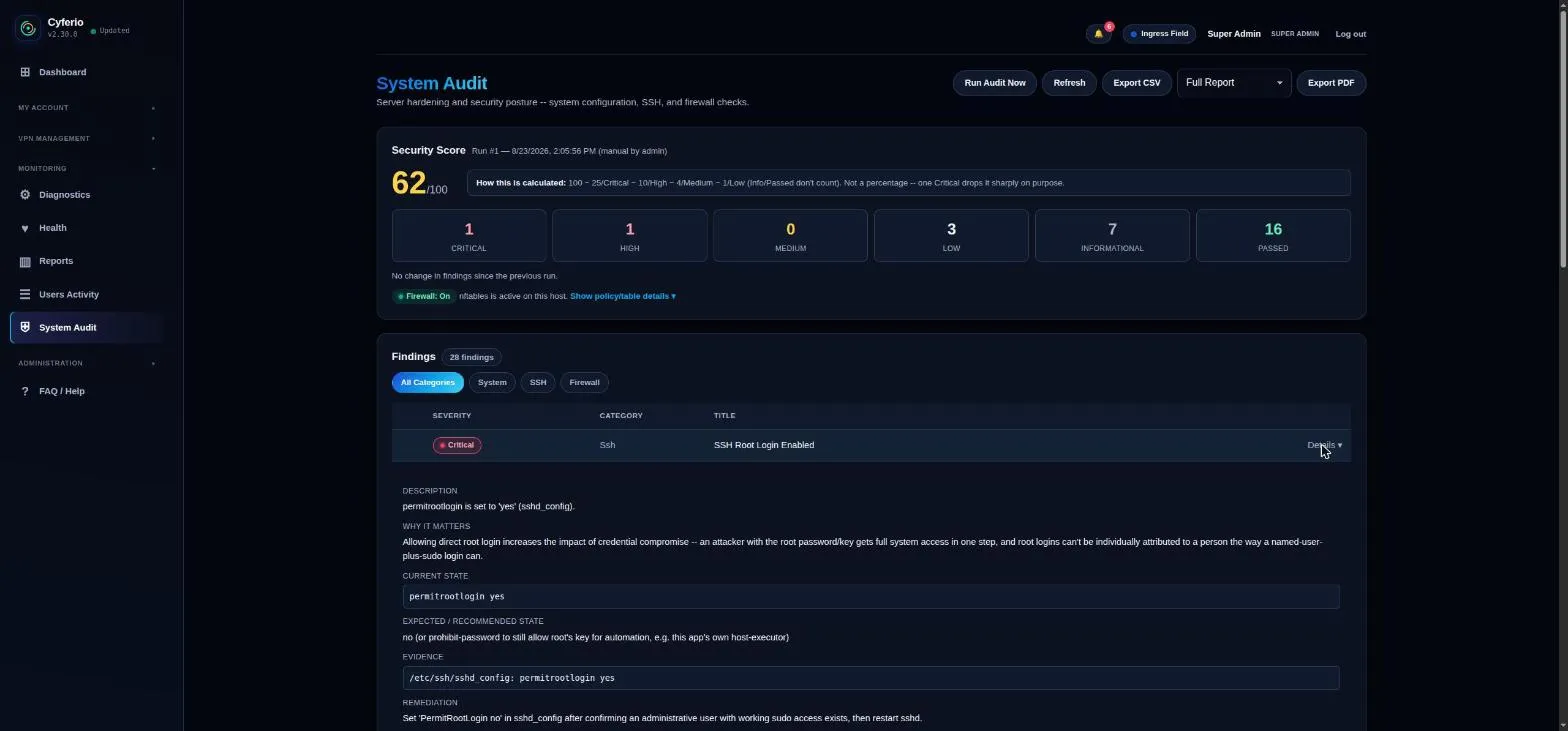
Click Details on any finding to see exactly what was checked, why it matters, the current vs. recommended state, and the underlying evidence (the actual config line or command output the finding is based on).
-
Some findings support Fix Automatically – a one-click remediation that validates the change before applying it and rolls back automatically if the result would be invalid. Read the warning box above the button carefully first: a small number of fixes (like disabling SSH root login) can lock you out if no other administrative access path exists.
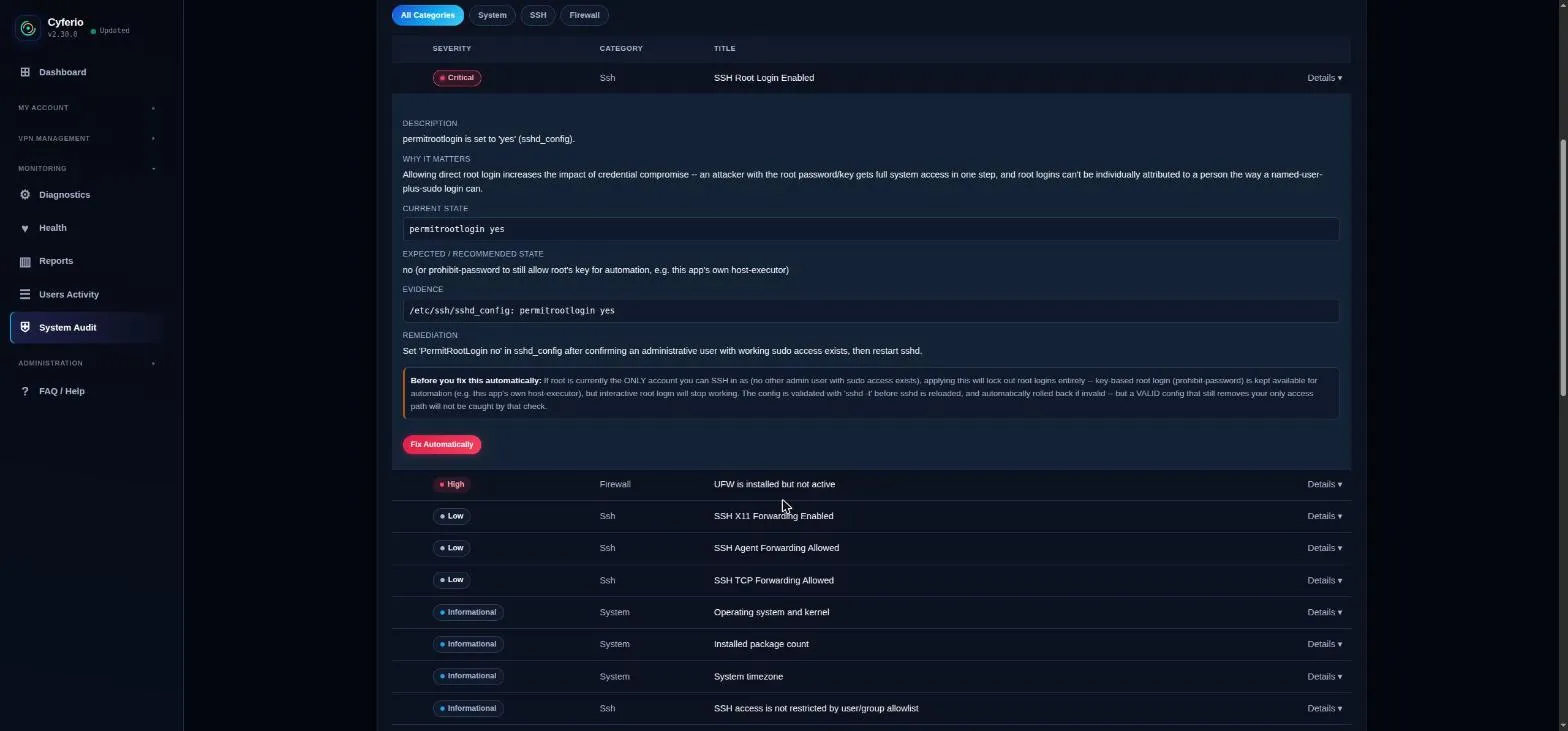
See System Audit for the full list of checks and how the Security Score is calculated.
Restrict a client’s access
Section titled “Restrict a client’s access”Beyond MAC-address binding (always enforced), each client can optionally be locked down further – by device OS, bandwidth quota, country/city, network (ASN), or specific IP addresses.
-
Go to VPN Clients and click Manage Restrictions on the client you want to lock down.
-
Set any combination of restrictions. Everything defaults to unrestricted – leaving a field blank or unchecked does not block the client, it just means that particular check is skipped.
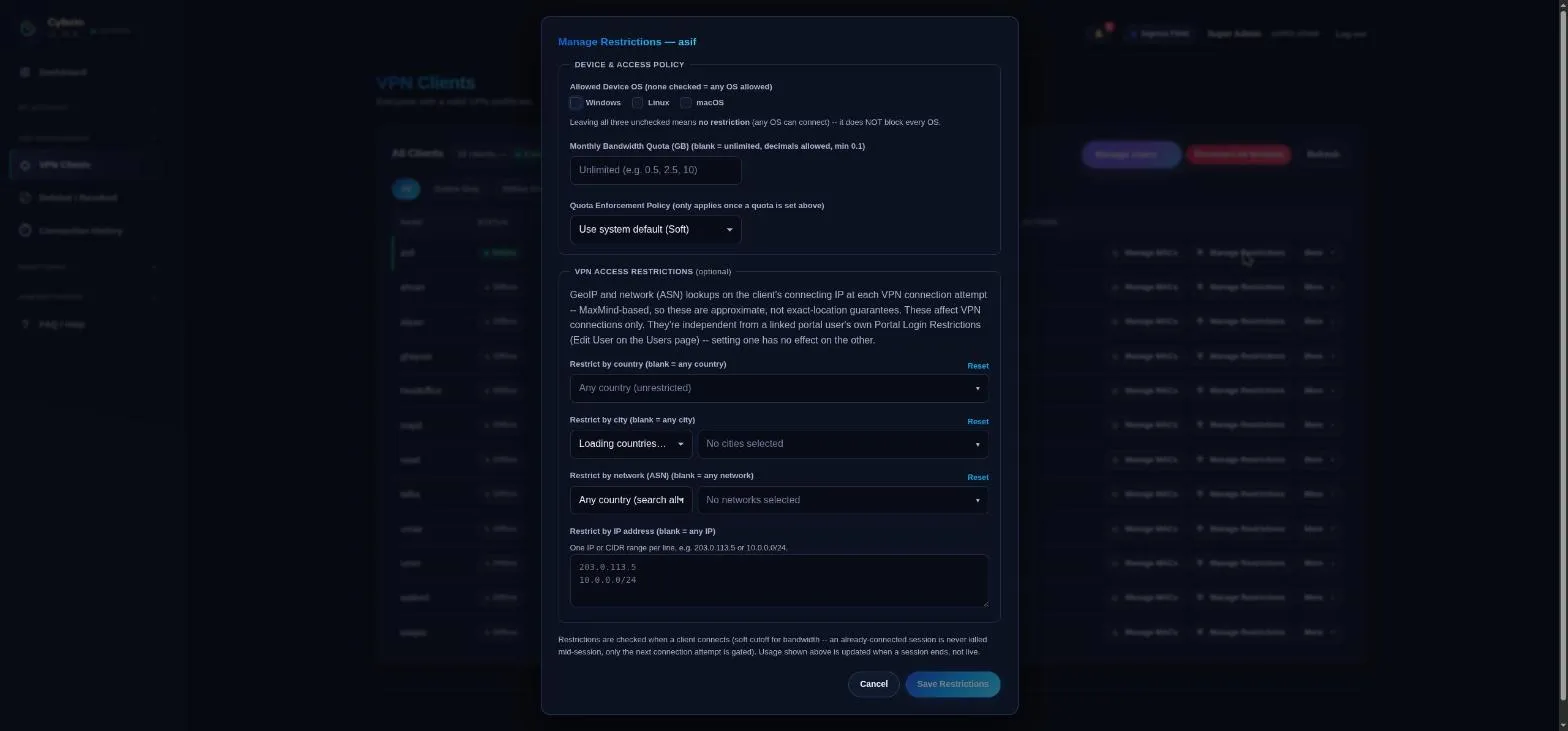
-
Click Save Restrictions. Restrictions are checked on the client’s next connection attempt, not applied retroactively to an already-connected session.
See Device & Access Restrictions for exactly how each restriction type is verified (GeoIP vs. direct IP match) and how it interacts with a linked portal user’s own login restrictions.
Set up multi-factor authentication (MFA)
Section titled “Set up multi-factor authentication (MFA)”Any account can enable TOTP-based MFA on itself, from its own profile page – no admin action needed.
-
Click your name in the sidebar to open My Profile, then scroll to Multi-Factor Authentication and click Enable MFA.
-
Scan the QR code with an authenticator app (Google Authenticator, Authy, 1Password, Bitwarden, or any RFC 6238-compatible app), or enter the key manually.
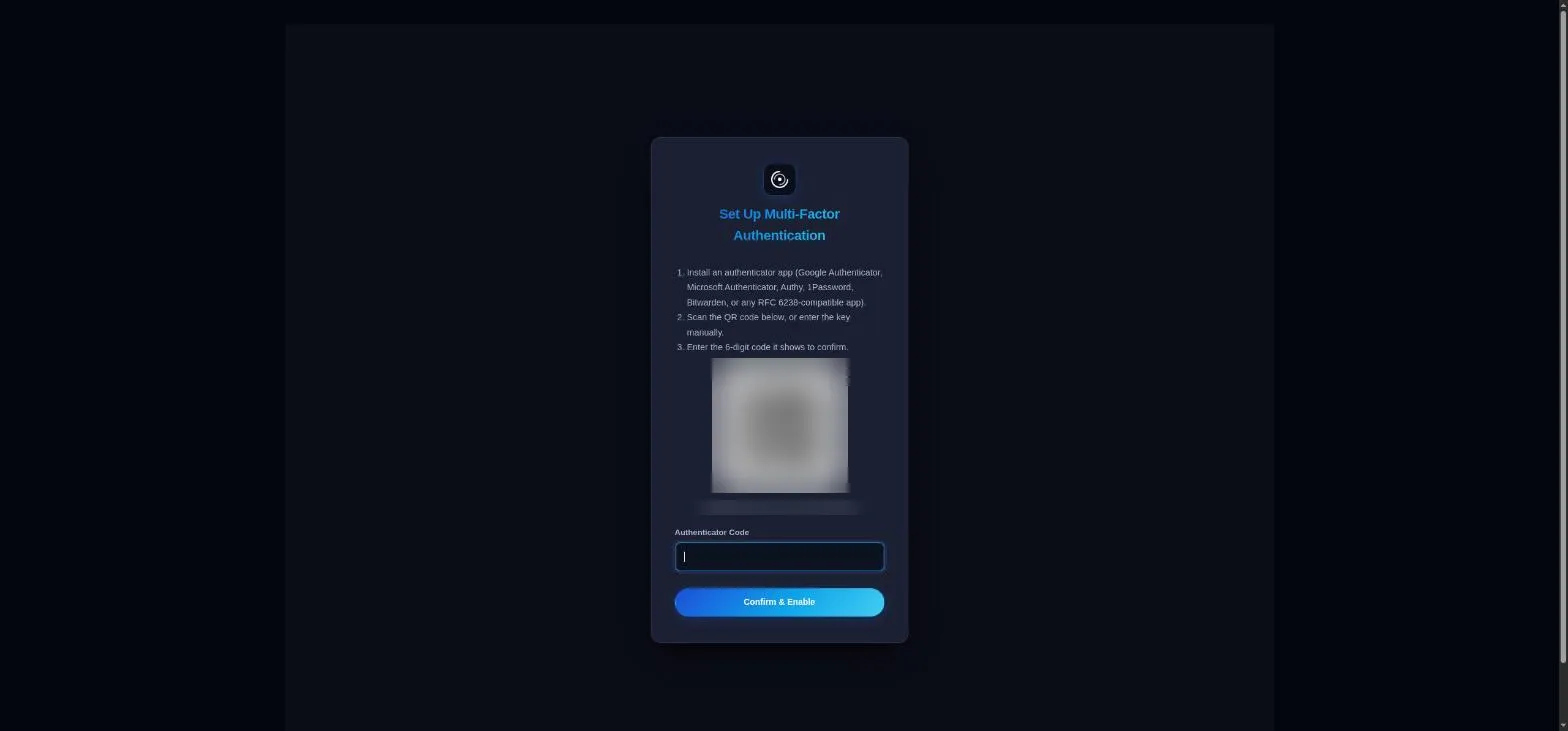
-
Enter the 6-digit code your app shows and click Confirm & Enable. You’ll be asked for a fresh code at every login from then on.
Check for and apply an update
Section titled “Check for and apply an update”An admin-only badge in the sidebar, next to the app name, tracks whether a newer release is available.
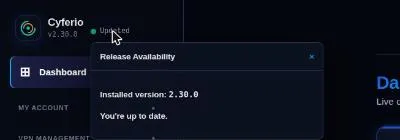
-
Hover (or click) the badge under the logo. It reads Updated when you’re current, or Update available/Critical update if not – the dot’s color also reflects severity.
-
If an update is available, the popup shows the installed vs. available version, release notes, and the exact upgrade command to run.
-
On the host itself, run:
Terminal window cd /opt/cyferio && ./upgrade.shThis does a zero-downtime blue/green rollout: pulls the new image, starts it alongside the current one, waits for it to report healthy, then stops the old one. Pass
--dry-runfirst to see what it would do without changing anything, or--tag vX.Y.Zto pin a specific release instead of always taking latest.
See Deployment & Configuration for the full upgrade reference, including what happens if a mid-upgrade step fails.
Recover a locked-out Super Admin account
Section titled “Recover a locked-out Super Admin account”The bootstrap admin (the very first admin account any deployment creates) is deliberately write-protected against every in-app path – no other admin, even another Super Admin, can reset its password, clear its MFA, or unlock it. If you lose access to that specific account, recovery has to happen on the host itself, outside the web app entirely.
-
SSH into the host and run
recover-admin.shfrom the repo root, combining whichever actions you need in one call:Terminal window cd /opt/cyferiosudo ./recover-admin.sh --reset-password --clear-mfa --unlock -
Re-type the bootstrap account’s username when prompted, to confirm (or pass
--yesto skip this for a scripted/non-interactive run). -
A new one-time password is printed once, directly to your terminal – never written to a file, logged, or emailed. Log in with it; you’ll be forced to set a real password immediately.
Every flag is independent and combinable – --reset-password, --clear-mfa, --unlock, and --regenerate-recovery-codes cover the four locked-out scenarios individually, or all at once for “I’m fully locked out.” Every action is still written to the normal audit log, same as if it had happened through the UI.
Developed by Cloudlative